Blog

  • A Closer Look at the Ninja Fit Compact Personal Blender

    A Closer Look at the Ninja Fit Compact Personal Blender

    Introduction

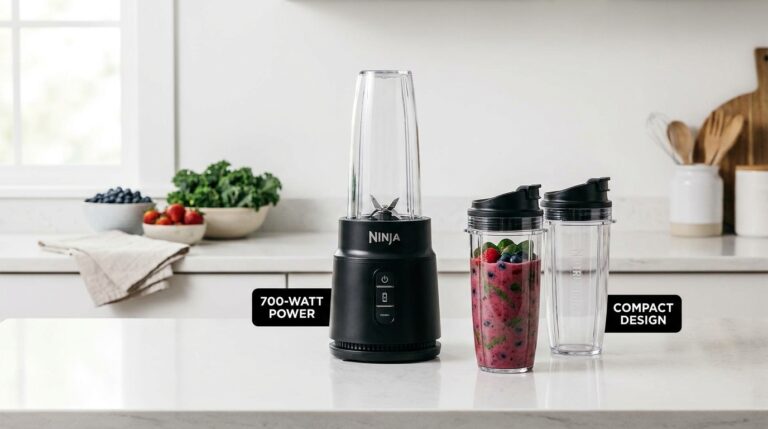
    Not everyone needs a large countertop blender taking up permanent space in the kitchen, especially if the main use case is preparing a single smoothie or shake at a time. The Ninja Fit Compact Personal Blender, model QB3001SS, is built specifically around that kind of everyday use, offering a 700-watt motor paired with two 16-ounce to-go cups that include spout lids, all housed in a compact black countertop design.

    This article looks at what a compact personal blender like this one generally offers, how its features tend to be used in practice, the kinds of routines and households it’s best suited for, and the practical details worth considering before deciding whether it belongs on your counter. The goal is to give you a clear, informative overview rather than a sales pitch, so you can weigh the details for yourself.

    Key Features

    The Ninja Fit brings together a handful of specific design choices, each worth understanding on its own terms.

    700-Watt Motor The motor is rated at 700 watts, which places it slightly above some entry-level personal blenders and generally supports breaking down fruits, vegetables, and ice with a reasonable amount of consistency for everyday blending needs.

    Compact Countertop Footprint As the name suggests, this blender is designed to be smaller and more space-efficient than standard full-sized blenders, making it easier to fit on a smaller counter or store in a cabinet between uses without taking up significant space.

    Two 16-Ounce To-Go Cups Rather than a single blending pitcher, the unit comes with two individual 16-ounce cups, allowing two single-serving portions to be prepared and stored, or simply giving the option to have a spare cup ready without needing to wash the first one immediately after use.

    Spout Lids for On-the-Go Use Each cup includes a spout lid, designed to allow the blended contents to be consumed directly from the same cup used for blending, without needing to pour the drink into a separate container before heading out the door.

    Designed for Smoothies, Shakes, and Frozen Drinks The blender is specifically positioned around these three categories of drinks, which generally require breaking down a combination of fresh or frozen fruit, liquid, and sometimes ice or protein powder into a smooth, consistent texture.

    Simplified, Single-Function Operation Compact personal blenders like this one are generally designed around straightforward operation, typically involving locking the cup onto the base and activating a single blend function, rather than offering multiple speed settings or programmed cycles found on larger, more feature-dense blenders.

    How It Can Be Used

    Given its compact size and to-go-focused design, this type of blender tends to fit into a fairly specific set of everyday routines.

    Morning smoothies are one of the more common uses, particularly for people who prepare a quick breakfast smoothie before heading to work or starting their day, valuing the ability to blend directly into a cup that can then be capped and taken along.

    Post-workout shakes are another frequent application, especially for those incorporating protein powder into a recovery drink after exercise, where the compact size and quick blending process fit naturally into a post-gym routine.

    Frozen fruit-based drinks benefit from the motor’s ability to break down colder, harder ingredients, which is a common component of many smoothie recipes built around frozen fruit rather than fresh produce paired with separate ice.

    Meal replacement blending is a practical use case as well, particularly for individuals who rely on a blended shake or smoothie as a quicker alternative to a more involved breakfast or meal during busier parts of the day.

    Batch-preparing two portions at once is supported by the inclusion of two cups, which can be useful for couples or roommates who each want their own smoothie prepared around the same time, or for someone who wants to prepare two servings without immediately needing to wash and reuse a single cup.

    Simple food prep beyond drinks is another possible use, including tasks like blending small batches of sauces or dressings, though the appliance’s core design and marketing lean heavily toward smoothies, shakes, and frozen drinks specifically.

    On-the-go transport is a defining use case given the included spout lids, which allow the blended cup to double as a travel container, reducing the need to transfer a finished drink into a separate cup or bottle before leaving the house.

    Who It May Be Suitable For

    Given its compact size, to-go focus, and dual-cup design, this blender tends to appeal to a fairly specific range of users and situations.

    Individuals with a consistent smoothie or shake routine, whether as part of a morning habit or post-workout recovery, are generally well matched to this blender’s straightforward, single-serving design.

    People with limited counter or storage space may specifically value the compact footprint, particularly in smaller kitchens, dorms, or apartments where a full-sized blender would take up more space than is practical.

    Those who prioritize convenience and portability may appreciate the spout lid design, which allows for blending and transporting a drink in the same container without additional dishes.

    Couples or small households of two may find the inclusion of two cups particularly useful, allowing both people to prepare individual portions without waiting to share or wash a single blending container between uses.

    Beginners easing into a blending routine may appreciate the simplified, single-function operation, which doesn’t require learning multiple speed settings or programmed cycles before getting comfortable using the appliance.

    On the other hand, those who regularly need to blend larger batches, work with tougher or more fibrous ingredients requiring higher motor power, or want a wider range of blending settings for different textures may find a compact personal blender like this one more limited than a full-sized countertop model.

    Important Things to Consider

    There are a few practical points worth thinking through before deciding whether this type of compact blender fits your kitchen.

    Capacity is intentionally limited. At 16 ounces per cup, this blender is designed around single servings rather than larger batches, so households looking to prepare bigger quantities at once, such as smoothies for a larger family gathering, may find the capacity restrictive compared to a full-sized blender pitcher.

    Motor power relative to more demanding blending tasks. A 700-watt motor is generally suitable for everyday smoothie and shake ingredients, including frozen fruit and ice, but may be less effective than higher-wattage blenders for particularly tough or fibrous ingredients, or for consistently crushing large quantities of ice on its own.

    Simplified controls mean less texture customization. Since the blender generally operates with a single blend function rather than multiple speed settings, achieving more specific textures, such as a chunkier blend versus a completely smooth one, may be less controllable compared to blenders offering pulse functions or variable speeds.

    Spout lid maintenance. As with any reusable lid involving a seal, it’s worth periodically checking the spout lid components for wear, since a worn seal can lead to leaks during transport, particularly if the blender is used frequently as an on-the-go container.

    Not generally designed for hot liquids. Like most personal blenders with a sealed cup design, this appliance likely isn’t intended for blending hot liquids, due to pressure buildup concerns within the sealed container, so it’s worth confirming specific guidance and allowing hot ingredients to cool before blending.

    Cleaning routine for two cups. While having two cups offers flexibility, it also means twice the cleanup if both are used regularly, so it’s worth factoring in your actual dishwashing routine and whether you’ll typically wash cups immediately after use or let them accumulate.

    Loading ratios for effective blending. As with most personal blenders, using a reasonable ratio of liquid to solid or frozen ingredients generally produces more consistent results and reduces strain on the motor, compared to overloading the cup with mostly solid ingredients and minimal liquid.

    Comparison of General Categories

    Rather than comparing this specific model to other individual competing blenders, it’s often more useful to compare compact personal blenders as a category to other common blending options.

    Compact personal blenders versus full-sized countertop blenders. Full-sized blenders generally offer larger capacity, higher motor power, and more varied settings, making them better suited to bigger batches or a wider range of recipes, including soups, nut butters, or larger family-sized smoothies. Compact personal blenders trade that versatility for a smaller footprint, simpler operation, and a stronger focus on individual, on-the-go servings.

    Personal blenders with multiple cups versus single-cup models. Blenders that include more than one cup, like this model’s pair of to-go cups, offer more flexibility for households with more than one regular user, or for anyone who wants a spare cup on hand without immediate washing. Single-cup personal blenders are generally more compact overall but require washing between uses if multiple servings are needed in succession.

    Compact blenders versus immersion blenders. Immersion blenders are handheld tools typically used directly within a pot or bowl, well suited to blending soups or sauces without transferring ingredients to a separate container. Compact personal blenders are self-contained units built around their own cup, making them better suited to smoothies and shakes than to blending directly within existing cookware.

    Lower-wattage personal blenders versus higher-wattage models. Some personal blenders on the market offer higher-wattage motors specifically aimed at more demanding blending tasks, such as consistently crushing very hard ice or processing tougher fibrous ingredients. A 700-watt model like this one is generally well matched to typical smoothie and shake recipes, though those with more demanding blending needs may want to compare motor specifications more closely across different personal blender options.

    Frequently Asked Questions

    Can both cups be used with the same blender base? Yes, personal blenders that include multiple cups are generally designed so that each cup can be attached to the same base and blade assembly, allowing you to blend separate portions using either cup interchangeably.

    Is a 700-watt motor strong enough to crush ice effectively? A 700-watt motor is generally capable of handling ice as part of a mixed smoothie recipe, particularly when combined with a reasonable amount of liquid, though consistently crushing large quantities of ice alone may place more strain on the motor than a typical blended drink recipe.

    Can the to-go cups be used for hot beverages? Most personal blender cups with a sealed lid design, including spout lids like these, generally aren’t intended for hot liquids due to pressure buildup concerns, so it’s advisable to let hot ingredients cool before blending unless specific product guidance states otherwise.

    How much liquid should be used relative to solid ingredients for the best blend? While exact amounts vary by recipe, personal blenders generally perform best with a reasonable proportion of liquid included alongside solid or frozen ingredients, since too little liquid relative to solids can result in uneven blending and added strain on the motor.

    Are the cups dishwasher safe? Many personal blender cups are generally considered dishwasher safe, though it’s worth checking the specific care instructions provided with the appliance, since guidance on the cups, lids, and blade assembly can vary by component.

    Is this blender suitable for preparing larger smoothies for a group? Since each cup holds 16 ounces and is designed around single servings, preparing smoothies for a larger group generally requires blending multiple individual portions rather than one larger batch, unlike a full-sized blender with a bigger pitcher capacity.

    Can the spout lid leak if the cup is placed in a bag while traveling? While spout lids are generally designed to reduce spilling during transport, no lid is entirely leak-proof under all conditions, so it’s worth checking that the lid is properly sealed and the cup is kept upright when possible, particularly for longer trips or if placed in a bag alongside other items.

    Conclusion

    The Ninja Fit Compact Personal Blender reflects a fairly focused approach within the broader personal blender category, built specifically around smoothies, shakes, and frozen drinks, with a compact footprint and two to-go cups designed for convenient, on-the-move use. Its 700-watt motor and straightforward, single-function operation make it well suited to everyday blending routines centered on individual servings, particularly for those who value portability and minimal counter space over larger batch capacity or extensive setting customization.

    Whether this type of compact blender fits your kitchen depends largely on how often you prepare individual smoothies or shakes, how much you value the ability to blend directly into a portable cup, and whether having two cups on hand matches your household’s typical usage pattern. Weighing these practical details against your own daily routine is generally the most useful way to decide if it’s the right choice for you.

  • A Practical Look at the Nutribullet Personal Blender

    A Practical Look at the Nutribullet Personal Blender

    Introduction

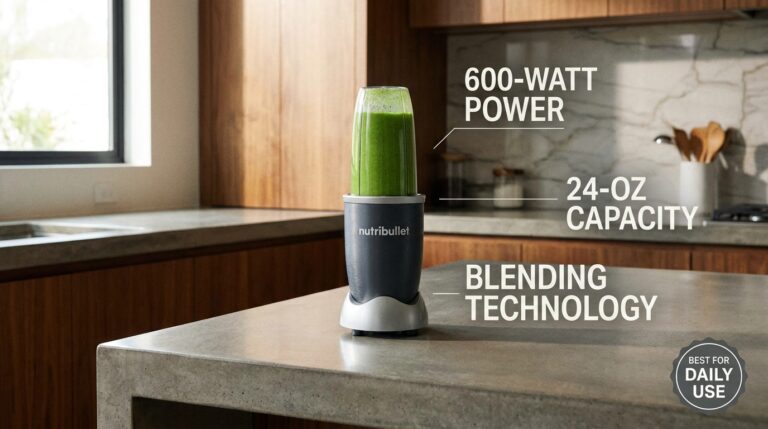
    Personal blenders occupy a fairly specific niche within the broader small kitchen appliance category: smaller than a full-sized countertop blender, designed around single-serving portions, and generally built with simplicity and speed in mind rather than the wide range of settings found on larger models. The Nutribullet Personal Blender, model NBR-0601WM, fits squarely into this category, offering a 24-ounce blending cup, a 600-watt motor, and a design centered around shakes, smoothies, general food prep, and frozen ingredient blending, housed in a dark grey finish.

    This article is meant to explain what a personal blender like this one generally does, how it tends to be used in daily routines, who’s likely to benefit most from owning one, and the practical considerations worth thinking through before deciding whether it fits your kitchen. As with any appliance, the intent here is to provide clear, balanced information rather than a sales pitch, so you can form your own judgment about whether it matches your needs.

    Key Features

    The Nutribullet Personal Blender is built around a fairly focused set of characteristics, each worth examining individually.

    600-Watt Motor The blender’s motor is rated at 600 watts, which sits within a common range for personal blenders designed to handle everyday blending tasks such as fruits, vegetables, and ice, without the higher wattage typically associated with larger, more heavy-duty countertop blenders built for continuous or commercial-style use.

    24-Ounce Blending Cup The included cup is sized for single-serving portions, generally suited to individual smoothies, shakes, or small-batch food prep, rather than the larger pitcher capacities found on standard countertop blenders intended for multiple servings at once.

    Personal, Single-Serve Design Rather than blending into a separate pitcher and then pouring the contents into a cup, personal blenders like this one are generally designed so the blending cup itself becomes the drinking vessel, often by attaching a travel lid after blending, which reduces the number of dishes involved in preparing a single serving.

    Frozen Ingredient Blending The appliance is designed to handle frozen ingredients, such as frozen fruit or ice, which is a common component of many smoothie recipes and requires a motor and blade design capable of breaking down harder, colder ingredients effectively.

    General Food Prep Capability Beyond drinks, personal blenders of this type are often used for smaller food prep tasks, such as blending sauces, dips, or small batches of ingredients that don’t require the larger capacity of a standard blender or food processor.

    Compact Footprint Given its smaller cup size and simpler design, this type of blender generally occupies less counter and storage space compared to a full-sized blender, which is a meaningful factor for smaller kitchens or those looking to minimize appliance clutter.

    How It Can Be Used

    Personal blenders like this one tend to be used for a fairly consistent set of everyday tasks, generally centered around individual portions and quick preparation.

    Daily smoothies and shakes are probably the most common use case, with many people using a personal blender specifically to prepare a single-serving smoothie or protein shake as part of a morning routine or post-workout habit, without needing to blend a larger batch or use a full-sized blender for one portion.

    Frozen fruit and ice-based drinks benefit from the blender’s ability to break down colder, harder ingredients, which is particularly relevant for smoothie recipes that rely on frozen fruit rather than fresh produce and ice cubes added separately.

    Small-batch food prep is another practical use, including tasks like blending salad dressings, small sauce portions, or pureeing baby food, where the smaller cup size is actually an advantage rather than a limitation compared to a larger blender pitcher.

    On-the-go beverage preparation is a common pattern with personal blenders generally, since the same cup used for blending can often be fitted with a travel lid, allowing someone to blend a drink and take it directly out the door without needing to transfer it to a separate container.

    Meal replacement or supplement blending is another frequent use, particularly for individuals incorporating protein powders, greens powders, or other supplements into a daily shake or smoothie routine.

    Quick cleanup blending sessions are also a practical pattern, since the compact single-cup design generally involves less cleanup than a full-sized blender pitcher, which can matter for people blending drinks frequently throughout the week and wanting to minimize dishwashing time.

    Who It May Be Suitable For

    Given its focus on single-serving portions and straightforward operation, this type of personal blender tends to appeal to a fairly specific set of users and situations.

    Individuals who regularly prepare a single smoothie or shake as part of a daily routine, such as a morning smoothie or a post-workout protein shake, are generally well matched to a personal blender’s single-serving design and simplified cleanup process.

    People with limited kitchen space may appreciate the smaller footprint of a personal blender compared to a full-sized countertop model, particularly in smaller apartments or kitchens where counter and storage space is limited.

    Those looking for a more portable blending option may find the ability to blend directly into a to-go cup, often with an included travel lid, particularly convenient for busy mornings or bringing a drink along while heading out.

    Households where only one or two people regularly use the blender for individual portions may find a personal blender better matched to their actual usage than a larger blender designed for multiple servings at once.

    Anyone newer to blending routines, such as someone just starting to incorporate smoothies or shakes into their diet, may find a personal blender a lower-commitment, simpler starting point compared to investing in a larger, more feature-dense countertop blender.

    On the other hand, larger households that regularly blend bigger batches, such as smoothies for multiple family members at once, or those who frequently need to blend larger quantities of soups, sauces, or other recipes, may find a personal blender’s capacity and motor power more limiting than what a full-sized blender would offer.

    Important Things to Consider

    There are several practical points worth thinking through before deciding whether a personal blender like this one fits your needs.

    Motor power relative to ingredients. A 600-watt motor is generally suitable for everyday blending tasks like fruits, vegetables, and ice, but may be less effective for particularly hard or fibrous ingredients compared to higher-wattage blenders designed for more demanding blending tasks, such as crushing very hard ice consistently or processing tougher vegetables.

    Capacity limitations for larger batches. A 24-ounce cup is generally intended for single servings, so this type of blender isn’t typically well suited to preparing larger batches for multiple people at once, which is an important distinction from full-sized countertop blenders with larger pitcher capacities.

    Blade and cup maintenance. As with most blenders, the blade assembly and cup require regular cleaning after each use to prevent residue buildup, and it’s worth checking the specific care instructions for the model, since components may vary in terms of dishwasher compatibility versus requiring hand washing.

    Limited settings compared to full-sized blenders. Personal blenders are generally designed around simplicity, often with a single blending function rather than the multiple speed settings, pulse functions, or pre-programmed cycles found on larger, more feature-dense countertop blenders, which is worth considering if you’re looking for more granular control over blending texture.

    Ingredient loading and liquid ratios. Personal blenders generally perform best with a reasonable ratio of liquid to solid ingredients, and overloading the cup with too many solid or frozen ingredients relative to liquid can sometimes result in uneven blending or strain on the motor, so it’s worth following general blending guidelines for best results.

    Not typically designed for hot liquids. Many personal blenders, including smaller single-serve models, aren’t designed to handle hot liquids safely due to pressure buildup concerns in a sealed cup, so it’s worth confirming specific guidance before attempting to blend anything heated.

    Travel lid and seal maintenance. If the blending cup is used as a to-go container with a travel lid, it’s worth periodically checking the seal and lid components for wear, since these parts are important for preventing leaks during transport.

    Comparison of General Categories

    Rather than comparing this specific model to individual competing blender brands, it’s often more useful to compare personal blenders as a category to other common types of blending appliances.

    Personal blenders versus full-sized countertop blenders. Full-sized blenders generally offer larger capacity, more powerful motors, and a wider range of settings, making them better suited to blending larger batches, tougher ingredients, or more varied recipes like soups and nut butters. Personal blenders trade that versatility for a smaller footprint, simpler operation, and reduced cleanup, which tends to suit single-serving, everyday blending tasks more effectively.

    Personal blenders versus immersion blenders. Immersion, or stick, blenders are handheld tools generally used directly in a pot or bowl, well suited to blending soups or sauces in their existing container without transferring ingredients elsewhere. Personal blenders are self-contained units with their own cup, better suited to smoothies and shakes than to blending directly within a larger cooking vessel.

    Personal blenders versus food processors. Food processors are generally designed for a broader range of food prep tasks, including chopping, slicing, and shredding, in addition to blending, and typically handle larger volumes and drier ingredients better than a personal blender. Personal blenders are more specifically optimized for liquid-based blending tasks like smoothies and shakes, rather than the wider variety of food prep functions a processor offers.

    Compact personal blenders versus larger, higher-wattage personal blenders. Some personal blenders on the market offer higher wattage motors specifically marketed for more demanding blending tasks, such as consistently crushing very hard ice or handling tougher fibrous ingredients. A 600-watt model like this one is generally well suited to typical smoothie and shake ingredients, though those with more demanding blending needs may want to compare motor specifications more closely across different personal blender options.

    Frequently Asked Questions

    Can this type of blender crush ice effectively? Personal blenders with a 600-watt motor are generally capable of crushing ice as part of a smoothie or frozen drink recipe, particularly when combined with a reasonable amount of liquid, though consistently crushing large quantities of ice alone, without other ingredients, may be more demanding on the motor than blending a typical mixed smoothie.

    Is it safe to blend hot liquids in a personal blender like this one? Many personal blenders, due to their sealed cup design, aren’t intended for hot liquids because of pressure buildup concerns, so it’s generally recommended to let hot ingredients cool before blending unless the specific product documentation states otherwise.

    How much liquid should be added relative to solid ingredients for best results? While exact ratios vary by recipe, personal blenders generally perform best with a reasonable amount of liquid included alongside solid or frozen ingredients, since too little liquid relative to solids can make blending less effective and put additional strain on the motor.

    Can the blending cup double as a drinking cup for on-the-go use? Many personal blenders, including single-serve models like this one, are designed so the same cup used for blending can be fitted with a separate travel lid, allowing it to be used directly as a drinking container without transferring the contents elsewhere.

    Is this type of blender suitable for making larger batches for a family? A 24-ounce cup is generally intended for single servings, so preparing larger batches for multiple people typically requires blending multiple individual portions separately, rather than blending one large batch at once, unlike a full-sized blender with a larger pitcher capacity.

    How is a personal blender different from a standard countertop blender in terms of care? Care generally follows similar principles, including regular cleaning of the blade assembly and cup after each use, though it’s worth checking specific manufacturer guidance, since dishwasher compatibility and hand-washing recommendations can vary between models and components.

    Can this blender be used for tasks other than smoothies, like sauces or dips? Personal blenders are often used for small-batch food prep tasks beyond just smoothies, such as blending dressings, dips, or small sauce portions, though very thick or dry mixtures may require more liquid or careful loading to blend effectively given the appliance’s smaller size and motor power.

    Conclusion

    The Nutribullet Personal Blender reflects a fairly specific approach within the broader blender category: prioritizing single-serving convenience, a compact footprint, and simplified cleanup over the larger capacity and expanded settings found on full-sized countertop blenders. Its 600-watt motor and 24-ounce cup are generally well suited to everyday tasks like smoothies, shakes, and small-batch food prep, particularly for individuals or those preparing portions for just one or two people at a time.

    Whether this type of personal blender fits your kitchen depends largely on how often you blend individual portions versus larger batches, how much counter and storage space you have available, and whether the convenience of blending directly into a to-go cup matters to your daily routine. Weighing these practical factors against your own habits is generally the most useful way to determine if it’s the right choice for your kitchen.

  • Understanding the Ninja Air Fryer AF141: A Practical Overview

    Understanding the Ninja Air Fryer AF141: A Practical Overview

    Introduction

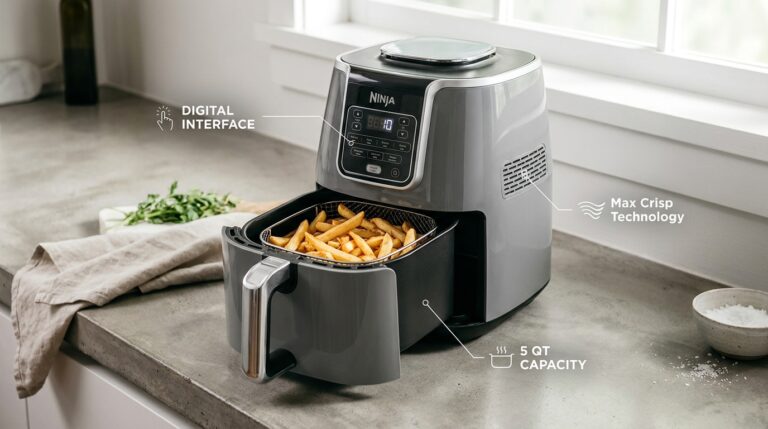
    Air fryers have moved from a niche kitchen gadget to one of the more commonly owned countertop appliances over the past several years, largely because they offer a middle ground between the convenience of an oven and the texture typically associated with deep frying, without the same volume of oil. The Ninja Air Fryer AF141 is one example of this category, offering a 5-quart capacity, a stated ability to fit up to four pounds of fries at once, four distinct cooking functions, a maximum temperature of 400°F, 1750 watts of power, and a nonstick basket and crisper plate combination housed in a grey finish.

    This article is intended to walk through what this kind of appliance generally does, how each function tends to be used in everyday cooking, who’s likely to find it genuinely useful, and the practical factors worth thinking about before deciding whether an air fryer like this one fits into your kitchen routine. Rather than presenting this as a sales pitch, the aim is to lay out balanced, informative details so you can make your own judgment.

    Key Features

    The Ninja Air Fryer AF141 combines several specific design elements and functions, each worth breaking down individually.

    Air Crisp Technology At the core of the appliance is its air frying function, which circulates hot air rapidly around food to produce a crisped, browned exterior similar in some ways to deep frying, but using significantly less oil, often just a light coating or spray, rather than fully submerging food in fat.

    5-Quart Capacity The unit’s capacity is specifically sized to accommodate a reasonably sized batch of food in a single cooking session, with the manufacturer citing the ability to fit up to four pounds of fries at once, which gives a general sense of the appliance’s practical volume for family-sized portions or moderate batch cooking.

    Four Cooking Functions Beyond air frying, the appliance includes roast, reheat, and dehydrate functions, each using a slightly different combination of temperature and airflow suited to its specific purpose. Roasting is generally aimed at foods that benefit from more even, oven-style heat, reheating is designed to restore texture to leftovers without drying them out excessively, and dehydrating uses lower, sustained heat over a longer period to remove moisture from foods like fruit or vegetables for snacks such as dried fruit or vegetable chips.

    400°F Maximum Temperature The appliance is capable of reaching temperatures up to 400 degrees Fahrenheit, which sits within the general range associated with achieving a crisped, browned texture on foods like fries, chicken wings, or roasted vegetables.

    1750 Watts of Power This wattage figure reflects the appliance’s overall power draw and is generally associated with how quickly it can heat up and maintain temperature during cooking, which can influence overall cook times compared to lower-wattage models.

    Nonstick Basket and Crisper Plate The included basket and separate crisper plate are designed with a nonstick coating, intended to make food easier to remove after cooking and simplify cleanup, while the crisper plate specifically allows hot air to circulate underneath food for more even cooking and browning on all sides.

    How It Can Be Used

    Air fryers with this kind of function range tend to get used across a fairly broad set of everyday cooking tasks, extending well beyond the “fries and chicken wings” reputation the category is often associated with.

    Everyday side dishes are a common use, particularly for vegetables like broccoli, Brussels sprouts, or sliced potatoes, which many people find develop a satisfying crisped texture using the air crisp function with just a light coating of oil.

    Proteins like chicken, fish, and other cuts of meat are frequently prepared using either the air crisp or roast function, often producing a browned exterior while keeping the inside relatively moist, in less time than a conventional oven might require for a similar result.

    Reheating leftovers is a specific and fairly popular use case, since the reheat function is generally designed to restore some of the original texture to foods like pizza, fried items, or roasted dishes that tend to turn soggy when reheated in a microwave.

    Roasting vegetables or smaller cuts of meat benefits from the more even, oven-style heat associated with the roast function, which some users find preferable to the more concentrated, direct airflow of the air crisp setting for certain dishes.

    Dehydrating fruits, vegetables, or herbs is a less commonly used but genuinely practical function for households interested in preparing snacks like dried apple slices, vegetable chips, or herbs for storage, using the appliance’s ability to maintain a low, steady temperature over an extended period.

    Reduced-oil cooking for typically fried foods is one of the more frequently cited motivations for using an air fryer generally, since foods like frozen fries, chicken tenders, or breaded items can often be prepared with a texture reasonably close to deep frying while using significantly less oil.

    Smaller batch cooking without preheating a full oven is another practical use, particularly for smaller households or situations where heating an entire oven for a modest portion of food feels excessive or takes longer than necessary.

    Who It May Be Suitable For

    Given its function range and moderate capacity, this type of air fryer tends to appeal to a fairly broad set of households, though certain situations make it especially relevant.

    Households looking to reduce oil usage in everyday cooking, particularly for foods traditionally associated with frying, may find the air crisp function a practical way to achieve a similar texture with meaningfully less oil.

    Smaller to medium-sized households are generally well matched to a 5-quart capacity, which offers enough room for family-sized portions without requiring the larger capacities aimed at bigger batch cooking.

    People who frequently reheat leftovers may specifically value having a dedicated reheat function, since it’s designed to avoid some of the sogginess commonly associated with microwave reheating.

    Those interested in a faster alternative to preheating a full oven for smaller meals or side dishes may appreciate the appliance’s typically shorter preheat and cook times compared to a conventional oven.

    Home cooks interested in dehydrating snacks at home, such as dried fruit or vegetable chips, may find the dedicated dehydrate function a useful addition without needing a separate, single-purpose dehydrator appliance.

    Those with limited kitchen space who want a versatile appliance covering several cooking styles in one unit may appreciate consolidating air frying, roasting, reheating, and dehydrating functions into a single footprint rather than multiple separate appliances.

    On the other hand, very large households doing extensive batch cooking, or those who already own multiple overlapping appliances such as a convection oven and a dehydrator, may find a 5-quart air fryer offers less added value relative to their existing setup and cooking volume needs.

    Important Things to Consider

    There are several practical points worth thinking through before deciding whether this type of air fryer is right for your kitchen.

    Capacity limitations for larger households. While a 5-quart capacity and the ability to fit up to four pounds of fries is generally suitable for small to medium households, larger families or those regularly cooking for more people may need to prepare food in multiple batches, which affects total cooking time for larger meals.

    Counter space requirements. Air fryers of this size take up a reasonable amount of counter space, and it’s worth confirming the unit’s dimensions against your available kitchen space before purchasing, particularly if you plan to keep it out permanently rather than storing it between uses.

    Learning proper food arrangement for even cooking. Air fryers generally cook most evenly when food is arranged in a single layer with some space between pieces, rather than tightly packed, which may require some adjustment for those used to more forgiving oven cooking, where crowding is less of a concern.

    Cleaning the basket and crisper plate. While the nonstick coating is designed to simplify cleanup, regular cleaning after each use is still generally recommended to prevent residue buildup, particularly from oil or breading, which can affect performance and smoke production during subsequent uses if left uncleaned.

    Adjusting recipes from conventional ovens. Recipes originally written for conventional ovens often need some adjustment in both temperature and cook time to work well in an air fryer, since the more direct, rapid air circulation tends to cook food faster than a standard oven at the same listed temperature.

    Noise level during operation. Air fryers generally rely on an internal fan to circulate hot air, which produces a noticeable level of operational noise, something to factor in if you’re particularly sensitive to appliance noise or plan to use it in a shared living space.

    Power consumption considerations. At 1750 watts, this appliance draws a meaningful amount of power during operation, which is worth keeping in mind alongside other kitchen appliances being used simultaneously, particularly in kitchens with limited circuit capacity.

    Comparison of General Categories

    Rather than comparing this specific model against other individual air fryer brands, it’s often more useful to compare air fryers as a broader category to other common cooking methods and appliances.

    Air fryers versus conventional ovens. Conventional ovens generally offer larger cooking capacity and are well suited to bigger meals or multiple dishes cooked simultaneously, but typically take longer to preheat and cook food compared to the more direct, rapid air circulation used in air fryers. Air fryers tend to be favored for smaller portions or when faster cooking times and a crisper texture are priorities.

    Air fryers versus deep frying. Deep frying generally produces a very specific texture and flavor profile that some cooks and foods are particularly suited to, but it requires a significant volume of oil, generates more mess, and involves food safety considerations around hot oil handling. Air frying offers a texture reasonably comparable to deep frying for many foods while using substantially less oil, though the results aren’t always identical, particularly for foods that rely heavily on oil for their traditional texture.

    Air fryers versus dedicated dehydrators. A dedicated, single-purpose dehydrator is often better suited to larger-batch or more frequent dehydrating tasks, since it’s specifically designed around that single function with more surface area typically available. An air fryer with a built-in dehydrate function offers a more space-efficient, occasional-use alternative for households that don’t dehydrate food often enough to justify a separate appliance.

    Air fryers versus microwave reheating. Microwaves are generally faster for reheating but often leave previously crispy foods soggy, since they primarily heat through moisture rather than circulating hot air. Air fryers with a dedicated reheat function tend to take a bit longer but are often better at restoring some of the original texture to foods like fried items, pizza, or roasted dishes.

    Frequently Asked Questions

    Does an air fryer actually fry food, or is it more like a small convection oven? Functionally, air fryers operate similarly to a compact convection oven, using a fan to rapidly circulate hot air around food. The term “air frying” refers to the resulting texture, which is intended to resemble traditional frying, rather than the food actually being submerged in oil.

    Is very little or no oil required when using the air crisp function? Many foods can be prepared with just a light coating or spray of oil, or in some cases with none at all depending on the food’s natural fat content, though a small amount of oil is often recommended to help achieve a more evenly browned, crisped texture.

    How does the dehydrate function differ from a dedicated food dehydrator? Both generally rely on low, sustained heat over an extended period to remove moisture from food, though a dedicated dehydrator often has more surface area and may be designed specifically to optimize airflow for larger dehydrating batches, whereas an air fryer’s dehydrate function is typically better suited to smaller quantities.

    Can frozen foods be cooked directly in this type of air fryer without thawing first? Many frozen foods, such as fries or breaded items, are commonly cooked directly from frozen in an air fryer, often with adjusted cook times compared to fresh or thawed versions of the same food, though specific guidance can vary by product.

    Why is it recommended to avoid overcrowding the basket? Air fryers rely on hot air circulating around food from multiple directions to achieve even cooking and browning, so overcrowding the basket can block airflow and result in uneven cooking or a less crisped texture, particularly on pieces that are touching or stacked.

    Is the nonstick basket safe to clean in a dishwasher? Many nonstick air fryer baskets and crisper plates are generally considered dishwasher safe, though it’s worth checking the specific care instructions provided with the appliance, since guidance can vary and hand washing is sometimes recommended to help preserve the nonstick coating over time.

    How does cook time in an air fryer compare to a conventional oven at the same temperature? Air fryers generally cook food faster than a conventional oven set to the same temperature, due to the more direct and rapid air circulation, so recipes often need to be adjusted with either a shorter cook time or a slightly lower temperature when converting from oven instructions.

    Conclusion

    The Ninja Air Fryer AF141 reflects the broader appeal of the air fryer category: a relatively compact appliance capable of producing a crisped, browned texture on a wide range of foods using significantly less oil than traditional frying, while also offering additional functions like roasting, reheating, and dehydrating within the same unit. Its 5-quart capacity and four cooking functions position it as a fairly versatile option for everyday cooking tasks, from side dishes and proteins to reheated leftovers and dehydrated snacks.

    Whether this type of air fryer fits your kitchen depends largely on your typical household size, how much you cook foods traditionally associated with frying, and how much value you place on consolidating several cooking functions into a single appliance. Weighing these practical factors against your own cooking habits and available kitchen space is generally the most useful way to determine if it’s a good match for your routine.

  • What to Know About Countertop Ice Makers: A Look at the EUHOMY Portable Ice Maker

    What to Know About Countertop Ice Makers: A Look at the EUHOMY Portable Ice Maker

    Introduction

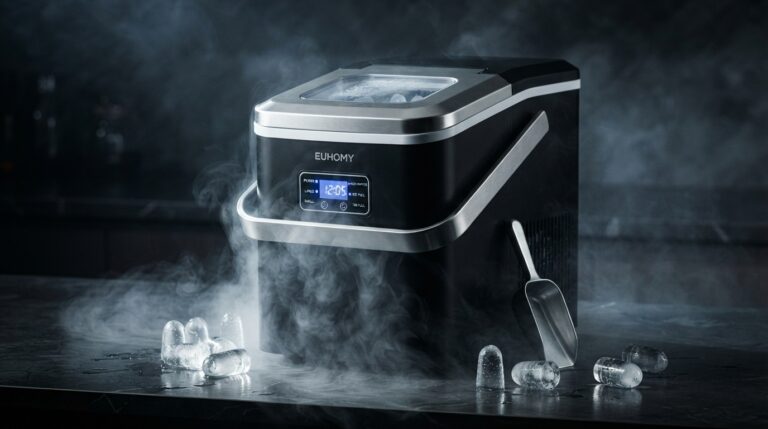
    There’s a particular kind of inconvenience that comes from running out of ice mid-gathering, or realizing your freezer’s built-in ice maker just isn’t keeping pace with how much your household actually uses. Countertop ice makers were designed to solve exactly that problem, offering a standalone appliance that produces ice on demand without relying on a plumbed-in freezer unit. The EUHOMY Countertop Ice Maker is one example of this category, built around a stated output of up to 26 pounds of ice within a 24-hour period, with individual batches of nine ice cubes ready in roughly six minutes, along with auto-cleaning functionality, a handle for portability, and an included basket and scoop.

    This article breaks down what a portable countertop ice maker like this one generally does, how it tends to be used across different settings, the kinds of households or situations that benefit most from having one, and the practical factors worth thinking through before adding one to your kitchen or travel setup. As with any appliance, the goal here is to give you clear, balanced information rather than a sales pitch, so you can decide for yourself whether this type of device is worth considering.

    Key Features

    Countertop ice makers like this one are generally defined by a handful of core characteristics, each worth understanding on its own.

    Rapid Ice Production Cycle One of the more commonly advertised features of countertop ice makers is their relatively fast production cycle, with this model generally producing a batch of nine ice cubes in around six minutes. This stands in contrast to traditional freezer ice trays, which typically take several hours to freeze a single batch, making countertop units considerably faster for on-demand ice needs.

    Daily Output Capacity Beyond individual batch speed, the unit is designed to produce up to 26 pounds of ice within a 24-hour period, assuming continuous operation and regular emptying of the storage basket, which gives a general sense of how much ice the machine can realistically supply over the course of a day for entertaining, daily use, or other higher-demand situations.

    Auto-Cleaning Function An auto-cleaning feature is included, generally intended to reduce the manual maintenance required to keep the internal components free of mineral buildup or residue, which can otherwise accumulate over time with regular use, particularly depending on local water hardness.

    Portable Design with Handle Unlike built-in ice makers, this unit is designed to be moved relatively easily from one location to another, aided by an integrated handle. This portability is a defining feature of the countertop category as a whole, distinguishing it from permanently installed ice-making systems.

    Included Basket and Scoop The unit comes with a basket for storing finished ice and a scoop for retrieval, which together make the ice maker more self-contained and ready to use without needing to source separate accessories.

    Compact, Standalone Format Rather than requiring a dedicated water line or built-in installation, this type of appliance is generally filled manually with water and operates as a self-contained countertop unit, which is part of what makes it suitable for locations without existing plumbing infrastructure.

    How It Can Be Used

    Because it doesn’t require a permanent installation, a countertop ice maker like this one tends to be used across a fairly wide variety of settings and occasions.

    Everyday kitchen use is one of the most straightforward applications, particularly for households whose refrigerator either lacks a built-in ice maker or doesn’t produce ice quickly enough to keep up with regular demand, such as during hot weather or when entertaining guests.

    Entertaining and gatherings are a common use case as well, since the combination of fast batch production and a meaningful daily output makes it easier to keep a steady supply of ice on hand for parties, cookouts, or other events where drink service is ongoing throughout the day.

    Camping and outdoor trips are another frequently cited use, given the unit’s portability and independence from a fixed water line. As long as a power source and a water supply are available, it can be used in settings like a campsite, cabin, or other temporary outdoor setup.

    RV and mobile living situations benefit from similar portability advantages, since RV refrigerators often have limited or no dedicated ice-making capability, making a standalone countertop unit a practical addition for road trips or extended travel.

    Home bars and beverage stations are a more specific use case, particularly for households that regularly prepare cocktails or cold beverages and want a more convenient, faster-replenishing ice source than what a standard freezer tray provides.

    Secondary or supplemental ice production is another way these units get used, even in kitchens that already have a built-in ice maker, particularly when that primary source isn’t sufficient during high-demand periods, such as holidays or larger gatherings.

    Who It May Be Suitable For

    Given its portability and moderate daily output, this type of countertop ice maker tends to appeal to a fairly specific range of households and situations.

    Households without a built-in freezer ice maker are perhaps the most direct fit, since a countertop unit offers a practical alternative without requiring a kitchen renovation or a new refrigerator purchase.

    Frequent hosts and entertainers who regularly need larger, faster-replenishing quantities of ice for guests may find the combination of quick batch cycles and meaningful daily capacity particularly useful compared to relying solely on a standard freezer tray.

    Campers, RV owners, and those with mobile or temporary living setups are a natural fit given the unit’s portable, standalone design, which doesn’t depend on a fixed plumbing connection.

    Home bartenders or those who frequently prepare cold drinks may appreciate having a dedicated, faster ice source rather than depleting a shared household ice supply throughout the evening.

    People in smaller living spaces, such as apartments or vacation homes, where a full-sized refrigerator with a built-in ice maker isn’t present or practical, may find a countertop unit a reasonable way to have consistent access to ice without additional plumbing work.

    On the other hand, households with minimal ice needs, or those who already have a reliable, sufficiently fast built-in ice maker, may find a separate countertop unit to be more capacity and appliance space than they actually require day to day.

    Important Things to Consider

    There are several practical details worth thinking through before deciding whether a countertop ice maker fits your needs.

    Ice shape and melting behavior. Ice produced by countertop machines like this one is often described as “bullet” or “nugget” shaped rather than the traditional cube shape produced by trays or built-in freezer ice makers. This shape tends to melt somewhat faster than denser ice cube shapes, which is worth factoring in depending on your intended use, particularly for drinks meant to be enjoyed over a longer period.

    Manual water filling requirement. Since this type of unit typically isn’t connected to a dedicated water line, it generally needs to be filled manually with water for each cycle or refill, which adds a small amount of ongoing maintenance compared to a plumbed-in system.

    Ice storage isn’t long-term. The included basket is generally designed for short-term storage rather than long-term freezing, meaning ice produced but not used relatively soon may begin to melt and needs to be either used, transferred to a freezer, or allowed to recirculate back into the water reservoir, depending on the specific machine’s design.

    Regular cleaning is still recommended. While an auto-cleaning function can help reduce some maintenance, periodic manual cleaning is still generally advisable to prevent mineral buildup or residue, particularly in areas with harder water, to help maintain consistent ice production quality over time.

    Noise and placement considerations. Like most compressor-based or thermoelectric appliances, countertop ice makers generate some operational noise and require adequate ventilation around the unit, which is worth factoring into where you plan to place it, especially in smaller kitchens or shared living spaces.

    Power source requirements. Since these units are electric, portability to locations like campsites or RVs still depends on having access to a compatible power source, whether that’s a standard outlet, generator, or another power supply appropriate for the appliance’s specifications.

    Daily output is based on continuous operation. The advertised 26-pound daily capacity generally assumes the unit is run continuously and emptied regularly, so real-world output may vary depending on how often the machine is used, how frequently ice is removed, and ambient conditions like room temperature and water temperature.

    Comparison of General Categories

    Rather than comparing this specific model to other individual brands, it’s often more useful to look at how countertop ice makers compare as a category to other common ways of producing ice at home.

    Countertop ice makers versus built-in freezer ice makers. Built-in ice makers are generally integrated into a refrigerator and connected to a dedicated water line, offering a more automated, hands-off experience over the long term. However, they typically produce ice more slowly and in smaller daily quantities than a dedicated countertop unit, and they aren’t portable, making countertop units a better fit for higher-demand situations or locations without existing plumbing.

    Countertop ice makers versus traditional ice cube trays. Ice cube trays are inexpensive, simple, and require no electricity, but they typically take several hours to freeze a single batch and require manual refilling and freezer space. Countertop ice makers trade that simplicity for significantly faster production and higher daily output, at the cost of needing a dedicated appliance and power source.

    Countertop ice makers versus purchasing bagged ice. Buying ice from a store offers convenience without needing any appliance at all, but requires regular trips and ongoing cost over time, along with the practical issue of freezer or cooler space for storage. A countertop ice maker involves an upfront appliance investment but can reduce the need for repeated ice purchases, particularly for households or situations with frequent or high ice demand.

    Portable ice makers versus larger, standalone ice machines. Larger commercial or semi-commercial ice machines typically offer substantially higher daily output and are often plumbed in for continuous operation, making them more suitable for businesses or very high-demand household situations. Portable countertop units, by contrast, prioritize compactness and mobility, generally offering a middle-ground output level suited to typical home, camping, or small-gathering use rather than continuous heavy-duty demand.

    Frequently Asked Questions

    How long does it take for a countertop ice maker to produce its first batch of ice after being filled? This varies by model, but production of an initial batch generally takes several minutes once the unit has been filled with water and powered on, with this particular model generally cited around six minutes for a batch of nine ice cubes.

    Does the ice produced by this type of machine taste different from ice made in a freezer tray? Ice quality and taste are generally more affected by the water source used than by the specific appliance, so using filtered or clean water typically produces similar results to what you’d get using the same water in a standard freezer tray.

    Can a countertop ice maker be used outdoors, such as at a campsite? Yes, as long as a suitable power source and clean water supply are available, portable countertop ice makers are commonly used in outdoor settings like campsites, provided the unit is protected from weather exposure and used according to manufacturer guidelines.

    Do I need to connect this type of ice maker to a water line? No, most countertop ice makers, including this type, are designed to be filled manually with water rather than requiring a dedicated plumbing connection, which is part of what makes them portable and suitable for locations without existing water lines.

    How often does the ice basket need to be emptied? Since the storage basket in a countertop ice maker generally isn’t designed for long-term freezing, ice is typically removed and used or transferred to a freezer relatively soon after production, rather than being left to accumulate for extended periods.

    Is the auto-cleaning function a substitute for regular manual cleaning? Auto-cleaning functions generally help reduce some routine maintenance, but periodic manual cleaning is often still recommended, particularly in areas with hard water, to help prevent mineral buildup and maintain consistent ice production quality over time.

    Will the machine produce the full 26 pounds of ice every single day regardless of use? The stated daily output generally reflects continuous operation under typical conditions, so actual daily production can vary based on factors like how often the unit is run, how frequently ice is removed from the basket, and the ambient temperature of the room and water being used.

    Conclusion

    The EUHOMY Countertop Ice Maker reflects a broader category of standalone, portable appliances designed to solve a fairly specific but common household problem: producing a reliable, faster supply of ice without depending on a built-in freezer ice maker or requiring a dedicated plumbing connection. Its combination of a quick production cycle, meaningful daily output, auto-cleaning functionality, and portable design makes it relevant to a range of situations, from everyday kitchen use and entertaining to camping trips and RV travel.

    Whether this type of appliance is worth adding to your kitchen or travel setup depends largely on how much ice your household typically needs, whether your existing ice source is keeping up with that demand, and how much you’d value the flexibility of a portable, standalone unit over a built-in system. Weighing these practical factors against your own routine is generally the most useful way to determine if a countertop ice maker like this one fits your needs.

  • The COSORI TurboBlaze 9-in-1 Air Fryer: Rethinking What a Single Countertop Appliance Can Realistically Do

    The COSORI TurboBlaze 9-in-1 Air Fryer: Rethinking What a Single Countertop Appliance Can Realistically Do

    Introduction

    Kitchen appliances tend to promise more than they deliver. The gap between what a product claims and what it actually does in a real kitchen with real cooking habits is something most people have experienced firsthand — the blender that can’t handle frozen fruit, the slow cooker that runs too hot on low, the air fryer that produces pale results because the heating element doesn’t distribute heat evenly. Skepticism about multi-function claims is earned through experience, and it’s the right frame to bring to any appliance that leads with a number — nine functions, in this case.

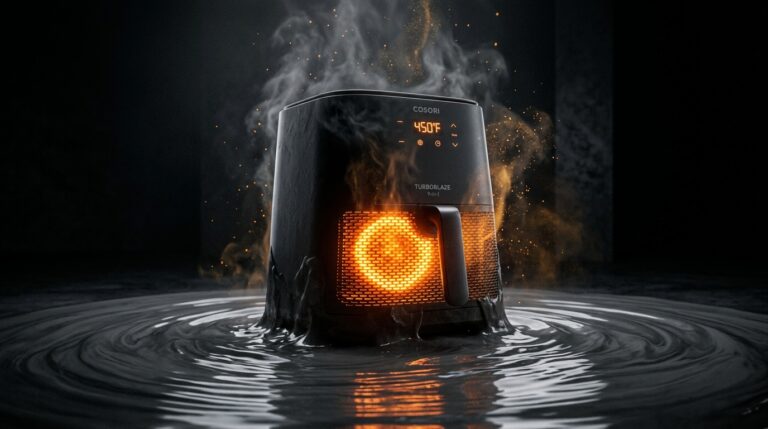
    The COSORI TurboBlaze 9-in-1 earns a different kind of examination because its nine functions aren’t the product of creative counting. They’re the product of a 360-degree temperature range — 90°F to 450°F — that makes each function occupy genuinely different cooking territory from the others. You can’t proof bread dough at 400°F without killing the yeast. You can’t dehydrate beef jerky at 400°F without cooking rather than drying it. You can’t broil effectively at 200°F. The range is what makes the breadth real, and the PFAS-free ceramic coating addresses a materials concern that has become increasingly mainstream in how households think about cookware.

    This fifth examination of the TurboBlaze takes a different approach from previous articles — starting not with the features list but with the underlying question of what genuinely changes in a kitchen when this appliance replaces a standard single-function air fryer.


    Starting From a Different Place: What Actually Changes

    The honest version of what changes when a household upgrades from a basic two or three-function air fryer to the TurboBlaze isn’t about having more buttons to press. It’s about the cooking decisions that become available rather than staying out of reach.

    With a standard air fryer capped at 400°F and covering Air Fry, Roast, and Reheat, the appliance handles a specific category of cooking well. Crispy proteins, roasted vegetables, reheated leftovers — these are genuinely valuable, and a capable basic air fryer does them reliably. But the cooking territory stops there. Bread proofing goes back to hoping the kitchen is warm enough. Dehydrating requires either a dedicated machine or buying commercial jerky. Broiling requires turning on the oven for a two-minute task. Small-batch baking means preheating a full-size oven for six muffins.

    The TurboBlaze changes all of these individual calculations by incorporating them into an appliance that’s already earning counter space through its core air frying function. The Proof function doesn’t add much physical space to the footprint — but it adds bread-making consistency that changes what home bakers can reliably produce on a weeknight. The Dry function doesn’t make the appliance bigger — but it adds homemade jerky and dried fruit to what’s practically achievable without buying another machine.

    This is the honest value proposition: not nine reasons to buy an appliance, but nine ways an appliance already earning its counter space becomes relevant to more of what a household actually cooks.


    The Temperature Range: Why 90°F to 450°F Matters More Than the Number Nine

    The Low End: 90°F and What It Enables

    Most air fryers start at 180°F or higher. That floor isn’t arbitrary — it reflects a design orientation around high-heat cooking, where the meaningful temperature range for crisping, roasting, and browning runs from roughly 350°F to 400°F. Below 200°F, standard air fryers have no useful cooking application, so the capability isn’t built in.

    The TurboBlaze’s 90°F minimum exists specifically to enable two functions that nothing above 150°F can perform properly:

    Proof at temperatures in the 90°F to 100°F range creates a warm, consistent environment for yeast fermentation. Yeast is active between roughly 70°F and 110°F, with peak activity in the 80°F to 95°F range. Below 70°F, yeast works very slowly. Above 115°F, yeast begins to die. The challenge for home bakers is that most kitchens don’t maintain a consistent temperature in the ideal proofing range — too cold in winter, inconsistently warm year-round, always subject to drafts and ambient fluctuations that make yeast behavior unpredictable.

    The TurboBlaze’s Proof function maintains a stable warm environment inside the sealed basket, independent of ambient kitchen temperature. The result isn’t just more convenient proofing — it’s more reliable proofing that produces more consistent rise and, ultimately, better bread. For households that bake yeasted bread, pizza dough, or enriched doughs like cinnamon rolls, this isn’t a minor convenience addition. It’s a genuine improvement in baking reliability.

    Dry at temperatures in the 130°F to 165°F range removes moisture from food through sustained gentle heat without cooking it in the conventional sense. This is the temperature range where water evaporates from food cells while proteins and other compounds remain mostly intact. Beef jerky requires 8 to 12 hours at these temperatures to safely remove moisture to preservation levels. Fruit chips dehydrate at the lower end of this range — 130°F to 135°F — over several hours. Herbs and flowers dry at even lower temperatures to preserve volatile aromatic compounds that higher heat destroys.

    None of these dehydration applications work above 200°F, where cooking begins rather than drying. The TurboBlaze’s low temperature floor makes genuine dehydration possible rather than cooking-while-attempting-to-dry, which is what a standard air fryer produces when its minimum temperature exceeds the dehydration range.

    The High End: 450°F and What It Changes

    Most consumer air fryers cap at 400°F. The TurboBlaze’s 450°F ceiling creates a meaningful functional addition: genuine broiling capability that produces surface charring and rapid browning at temperatures that standard air fryers can’t reach.

    The practical difference between 400°F and 450°F is more pronounced than 50 degrees might suggest. Surface browning reactions — the Maillard reaction that produces the caramelized, complex flavors on properly browned food surfaces — accelerate dramatically at higher temperatures. A salmon fillet at 400°F develops surface color over 12 to 15 minutes. At 450°F for the Broil function, the surface chars and caramelizes in 3 to 5 minutes, producing the kind of char that makes fish restaurant-quality rather than just properly cooked.

    The Broil function at 450°F also handles the quick surface-finishing tasks that feel disproportionate for the oven: browning the cheese top of a single-serve gratin, caramelizing a glaze on roasted carrots that’s already cooked through, finishing a portion of chicken with a crackling skin that a lower temperature would take much longer to achieve.


    The PFAS-Free Ceramic Coating: A Materials Decision Worth Understanding

    The PFAS conversation has become mainstream in cookware purchasing in ways that would have seemed niche five years ago. Understanding what the TurboBlaze’s ceramic coating actually offers — and what it requires — is more useful than a simple reassurance that it’s safer.

    What PFAS Are and Why the Air Fryer Context Is Relevant

    PFAS — per- and polyfluoroalkyl substances — are synthetic compounds found in the fluoropolymer coatings that define most non-stick cookware. The category includes PTFE (the compound in Teflon-branded coatings) along with PFOA and other compounds that manufacturers have progressively phased out of production under regulatory pressure.

    The air fryer context is specifically relevant for temperature reasons. At cooking temperatures up to 350°F, most PTFE coatings are considered stable by their manufacturers. Above 400°F — the maximum temperature of most consumer air fryers — some manufacturers note that coating degradation can begin to occur, particularly if the coating is scratched or worn. At the TurboBlaze’s 450°F Broil setting, a PTFE-coated basket would be operating at temperatures where the coating’s stability is more questionable.

    The ceramic coating’s chemistry doesn’t involve fluoropolymers. It achieves non-stick properties through an inorganic mineral matrix — silicon dioxide-based materials — that is considered chemically inert across the full temperature range the TurboBlaze operates at. At 90°F or 450°F, the ceramic coating behaves the same way: no PFAS compounds to consider, no temperature-dependent degradation concern.

    What the Ceramic Coating Requires in Practice

    Ceramic coatings are not equivalent to PTFE in durability characteristics. This isn’t a criticism — they’re different materials with different properties — but it’s important for realistic maintenance expectations.

    Ceramic coatings scratch more readily than PTFE when contacted with metal utensils. A metal tong or spatula dragged across a ceramic surface creates visible scratches that both compromise the non-stick properties and create surface irregularities. Silicone and wooden utensils avoid this entirely.

    Abrasive cleaning — steel wool, rough scrubbing pads, powdered abrasive cleaners — removes the ceramic surface layer gradually and noticeably. Soft sponge cleaning with mild dish soap handles all normal air fryer residue without abrasive contact.

    Dishwasher cycles subject ceramic coatings to high temperatures, harsh detergent chemistry, and mechanical water pressure repeatedly over time. Hand washing extends ceramic coating life more reliably than consistent dishwasher use.

    These care requirements aren’t excessive — they’re the standard care for ceramic cookware generally. Establishing them as habit from first use, rather than discovering their importance after coating degradation begins, is the approach that maintains performance through years of regular cooking.


    TurboBlaze Airflow Technology: The Heat Distribution Question

    Standard air fryer design creates an inherent unevenness in cooking results that most users compensate for without fully recognizing why they’re doing it. The mid-cook shake — universally recommended in air fryer recipes — exists because fixed-point airflow from above creates temperature gradients within the basket. Food directly in the primary airflow path cooks faster than food at the basket periphery. Shaking redistributes food to expose different surfaces and pieces to the more direct heat, compensating for the inherent unevenness.

    TurboBlaze technology refers to COSORI’s redesigned airflow architecture that circulates heat more comprehensively throughout the 6-quart cooking chamber. The engineering specifics — heating element positioning, fan design, airflow path geometry — work together to reduce the temperature differential between basket center and periphery.

    The practical outcome is more consistent browning across a full basket without requiring the same frequency of mid-cook agitation. A tray of chicken wings where all pieces develop comparable browning simultaneously rather than requiring repositioning to even out the results is what more uniform heat distribution actually means in cooking terms.

    This matters most in full-basket cooking for family-sized portions — exactly the scenario where uneven distribution shows most clearly and where the TurboBlaze’s design improvement has the most daily relevance.


    Nine Functions in Real Cooking Situations

    Air Fry: The Daily Workhorse

    The Air Fry function handles the cooking territory that defines the category — proteins, vegetables, and foods where rapid hot air circulation produces crispy exteriors with minimal added oil. Chicken pieces develop properly crisped skin. Fish fillets brown without drying out. Frozen snacks produce better texture than oven preparation. Vegetables develop caramelized edges in 12 to 18 minutes.

    This is the function most households use most of the time, and it’s the one where TurboBlaze airflow’s even distribution contributes most directly to daily cooking satisfaction.

    Roast: Different Parameters for Different Outcomes

    The distinction between Air Fry and Roast isn’t always immediately obvious because both involve hot air circulation around food. The difference is in temperature curves and timing — Roast is calibrated for denser foods that need to cook through at more measured temperatures before exterior browning becomes the priority.

    Whole chicken thighs benefit from Roast over Air Fry because the interior reaches proper temperature more consistently without the exterior overcooking before the bone-in meat is done. Pork tenderloin, dense root vegetables, whole sausages — these are Roast territory rather than Air Fry territory, and using the right function produces noticeably better results than defaulting to Air Fry for everything.

    Bake: Small-Scale Oven Replacement

    Six muffins don’t require preheating a full-size oven. Individual chocolate cakes in ramekins, a small batch of cookies, brownies in a 7-inch pan, individual bread rolls — these quantities fit within the TurboBlaze’s basket with appropriate accessories and bake in the Bake function without the energy expenditure and preheat time of the full oven.

    The Bake function combines with the Proof function to make complete bread-making from proofing through baking possible in the same appliance — a workflow that genuinely changes how practical home bread baking is on a weeknight schedule for households that bake regularly in modest quantities.

    Broil: Quick Surface Finishing Without the Oven

    The Broil function at 450°F covers the two to five-minute surface-finishing tasks that feel disproportionate to accomplish through the full oven broiler. Browning the top of a gratin. Charring the surface of a salmon fillet after it’s cooked through. Caramelizing a honey glaze on roasted carrots. These tasks are practical in the TurboBlaze in a way they’re not when they require running the oven broiler for a brief finishing task.

    Dry: Genuine Dehydration at Home

    The Dry function’s value crystallizes around a simple cost comparison. Commercial beef jerky is expensive relative to its nutritional content. Home jerky in the TurboBlaze uses lean beef marinated to personal preference specifications — controlling sodium, sweetness, spice level, and ingredient quality — at a fraction of commercial cost per serving.

    The 6-quart basket accommodates a single layer of jerky strips for a session, typically processing several servings of finished jerky at a time. Over a year of regular production for households that eat jerky frequently, the cost savings against commercial equivalent is meaningful.

    The same principle applies to dried fruit, vegetable chips, and herb drying — home production at lower cost with more ingredient control than commercial versions offer.

    Frozen: Calibrated for the Freezer Start

    The Frozen preset adjusts temperature and timing specifically for food going directly from freezer to basket, accounting for the temperature deficit and moisture content of frozen starting conditions. The practical difference from manually adapting the Air Fry function is consistency — the preset handles the calculation rather than requiring the user to remember to extend time and adjust temperature for frozen versus fresh.

    Proof: Reliable Bread Rising Regardless of Season

    Already covered in detail above — the Proof function’s 90°F-range temperatures create consistent yeast fermentation conditions independent of kitchen ambient temperature. This is the function that contributes most directly to baking reliability across seasons and kitchen conditions.

    Reheat: The Function That Changes Leftover Expectations

    Leftover pizza in the TurboBlaze’s Reheat function for three to four minutes returns with a crisp base rather than the soft, sometimes rubbery texture that microwave reheating produces regardless of technique. Leftover fried chicken regains close to original crunch. Pastries, spring rolls, samosas — anything with a crispy component that microwave heat destroys emerges from the Reheat function in far better condition.

    For households where leftovers are a regular part of the weekly eating pattern, the accumulated quality improvement across multiple reheating sessions per week represents a genuinely better daily food experience.

    Keep Warm: Holding Without Overcooking

    Keep Warm maintains safe serving temperature without continuing to cook — useful when components of a meal finish at different times. Food quality is maintained well for holding periods up to 20 to 30 minutes. Extended holds beyond that gradually affect crispy textures as the warm enclosed environment creates some humidity.


    Who Gets the Most From the TurboBlaze

    The Household Already Moving Away From PFAS in Cookware

    For kitchens that have replaced PTFE pans with ceramic, stainless, or cast iron alternatives, a PTFE-coated air fryer basket is an inconsistency in an otherwise PFAS-conscious approach to cookware. The TurboBlaze resolves that inconsistency without requiring a separate purchasing compromise.

    The Home Baker Who Wants More Consistency

    The Proof and Bake functions together address the two most variable stages of home bread baking — reliable rise and appropriate baking temperature in a compact environment. For households that bake regularly in modest quantities, this combination changes what’s reliably achievable more than any other feature pairing in the TurboBlaze’s function set.

    The Household That Makes Snacks From Scratch

    For families or individuals who regularly purchase jerky, dried fruit, or dehydrated snacks, the Dry function provides the home production capability that changes these from purchased-only items to made-at-home items with better ingredient control and lower per-serving cost.

    The Three to Five Person Household

    The 6-quart basket with TurboBlaze’s even heat distribution specifically suits this household size — large enough for family cooking quantities in single loads, with airflow quality that maintains consistent results across a full basket rather than requiring partial loading for even browning.

    The Cook Who Has Felt Limited by a Basic Air Fryer

    Someone who has used a three-function air fryer and regularly wished for capabilities it doesn’t offer — specifically, the ability to properly dehydrate, proof bread, or broil without the oven — will find the TurboBlaze’s nine functions address exactly the gaps that generate those wishes.


    What Requires Honest Consideration

    The Care Requirements Are Non-Negotiable

    The ceramic coating’s PFAS-free advantage comes with maintenance requirements that are different from PTFE and that must be consistently applied from first use to matter. Metal utensils scratch ceramic surfaces noticeably. Abrasive cleaning damages the coating visibly. Dishwasher cycles degrade it faster than hand washing. These aren’t demanding requirements, but they require consistent application — not as a special-occasion precaution, but as the everyday norm for how the basket is used and cleaned.

    Households with a track record of treating non-stick surfaces without care should factor this realistically into the decision.

    Nine Functions Don’t All Get Equal Use

    Most households will find three or four functions doing most of the work — Air Fry, Reheat, and one or two others based on specific cooking habits. The remaining functions get used in specific situations rather than daily rotation. This is expected and fine — having the capability available when needed is the value, not using all nine functions every day. But going in with realistic expectations about which functions will actually become regular habits prevents the disappointment of feeling like unused functions represent wasted money.

    Counter Space Is a Real Commitment

    A 6-quart air fryer requires dedicated counter space and overhead clearance for the basket to open fully during use. In kitchens where counter space is genuinely at a premium, the space commitment relative to the household’s actual cooking needs is worth evaluating honestly before purchasing.

    Baking Scale Has Clear Limits

    The 6-quart basket accommodates small baking accessories — 7-inch round pans, individual ramekins, small loaf pans. Standard full-size baking equipment doesn’t fit. For households that bake in large quantities or need standard pan sizes, the oven remains necessary for those applications. The TurboBlaze’s Bake function serves small-batch convenience baking, not large-scale baking production.


    How the TurboBlaze Sits in the Broader Landscape

    Against the Ninja AF181 XL

    The AF181 offers 6.5-quart capacity, a MaxCrisp function at 450°F, and six total functions. The TurboBlaze counters with PFAS-free ceramic coating, nine functions including Proof and Broil at 450°F, and the 90°F minimum that enables genuine dehydration. Larger capacity goes to Ninja. Broader temperature range, more functions, and PFAS-free surface go to COSORI. The choice reflects priorities: maximum capacity and crispness performance versus comprehensive function range and materials safety.

    Against the Instant Pot Vortex Plus

    The Vortex Plus brings a dishwasher-safe basket and stainless steel exterior. The TurboBlaze answers with PFAS-free ceramic coating, nine functions versus seven, a higher maximum temperature, and a broader overall range. Different priorities — cleanup convenience and build aesthetics versus cooking versatility and materials approach.

    Against Basic Four-Function Air Fryers

    Against entry-level models with Air Fry, Roast, Reheat, and Dehydrate as their entire function set, the TurboBlaze adds Proof, Bake, Broil, Frozen, and Keep Warm across a wider temperature range with PFAS-free surface. For households whose needs are genuinely limited to the basic four functions, the simpler model at lower cost covers those needs adequately. For those whose cooking reaches beyond those four functions regularly, the TurboBlaze’s additional capability has daily-life relevance rather than theoretical value.


    Frequently Asked Questions

    What’s the practical difference between using Air Fry versus Roast for chicken?

    Air Fry runs at higher temperatures with maximum fan speed, prioritizing rapid surface crisping. It works well for boneless, thinner cuts where cooking through happens quickly. Roast uses a temperature curve calibrated for cooking through denser, bone-in cuts more evenly before surface browning takes over. A boneless chicken breast cooks well on Air Fry. A bone-in thigh or drumstick produces better results on Roast because the interior reaches proper temperature without the exterior overcooking during the longer cooking time required.

    How do I know when bread dough has proofed enough in the Proof function?

    The visual test remains the most reliable indicator: properly proofed dough has roughly doubled in volume and, when poked gently with a floured finger, springs back slowly and only partially. Dough that springs back immediately isn’t proofed enough. Dough that doesn’t spring back at all is overproofed. The Proof function provides the consistent temperature environment; the baker still evaluates rise visually rather than relying solely on a timer.

    Can I make large batches of jerky in the TurboBlaze?

    The 6-quart basket accommodates a meaningful single-layer batch of jerky — typically enough for several servings of finished product per session. For very large production quantities, multiple sequential batches are needed. A dedicated multi-tray dehydrator handles larger volumes more efficiently. For households making jerky occasionally rather than commercially, the TurboBlaze’s capacity is appropriate.

    Does the Frozen preset work for all frozen foods, or just specific types?

    The Frozen preset is calibrated for typical frozen prepared foods — nuggets, fish sticks, fries, spring rolls, and similar items that go directly from freezer to basket. For unusual frozen items with very different moisture content or density than typical frozen snacks, manual adjustment through the Air Fry function with extended time may produce better results than the Frozen preset’s generic calibration.

    How does the TurboBlaze handle cooking for one person versus a family of five?

    The 6-quart basket accommodates both scenarios, though with different considerations. For one or two people, smaller quantities leave the basket partially filled — food should still be arranged in a single layer with adequate spacing, which remains achievable for smaller portions. For a family of five, the basket handles most everyday cooking in single loads. Very large quantities — enough wings for a group gathering, for example — may require two rounds.

    Is the Keep Warm function appropriate for extended holding?

    Keep Warm maintains safe serving temperature effectively and is appropriate for holding periods up to 30 minutes with minimal quality impact. For longer holds approaching an hour, crispy textures gradually soften as the warm enclosed environment creates some humidity retention. Loosely placing a piece of paper towel or foil over the basket opening (without closing the basket fully) during extended warm holding reduces humidity buildup and maintains crispy textures somewhat better.

    What cleaning routine works best for maintaining the ceramic coating long-term?

    After each use: allow the basket to cool completely before washing. Wash with warm water, mild dish soap, and a soft sponge or cloth. For stuck residue, soak in warm soapy water for 10 to 15 minutes before wiping — soaking loosens residue without requiring abrasive scrubbing. Dry thoroughly before storing. Avoid: metal utensils during cooking, steel wool or abrasive pads during cleaning, dishwasher cycles as the regular cleaning method. This routine maintains coating performance through years of daily use rather than months.

    Does the Broil function work for finishing steaks after sous vide or reverse sear cooking?

    The TurboBlaze doesn’t have a sous vide function, but for steaks cooked through any method that brings them to target internal temperature before searing — reverse sear in the oven, sous vide in a dedicated circulator — the Broil function at 450°F provides the high surface heat needed for a quick crust development. A 2 to 3-minute Broil session after the steak is already at target temperature produces surface char and browning. For the absolute fastest and most intense searing, a cast iron pan on high heat remains superior, but the Broil function is a practical alternative that keeps everything in one appliance.


    Conclusion

    Five examinations of the COSORI TurboBlaze from different angles consistently return to the same fundamental conclusions: the nine functions are genuinely distinct because the temperature range makes them distinct, the PFAS-free ceramic coating addresses a real and growing household concern that most competing products haven’t responded to, and the TurboBlaze airflow improvements reduce the most persistent limitation of standard air fryer design.

    What changes in a kitchen when the TurboBlaze replaces a basic air fryer isn’t primarily about having more buttons. It’s about bread that rises reliably regardless of season, homemade jerky that’s achievable without a dedicated dehydrator, broiling that doesn’t require turning on the oven, and consistently browned family-sized batches without constant mid-cook intervention. These are real changes to real cooking situations for households whose habits reach into that territory.

    The ceramic coating care requirements, the counter space commitment, the baking scale limitations, and the realistic expectation that not all nine functions will see equal daily use are all genuine factors that belong in any honest evaluation. Within those honest parameters, the TurboBlaze represents a thoughtfully engineered appliance that earns its counter space through genuine functional breadth rather than specification padding.

  • The Instant Pot Duo Plus 9-in-1: A Practical Guide to the Multicooker That Does Almost Everything

    The Instant Pot Duo Plus 9-in-1: A Practical Guide to the Multicooker That Does Almost Everything

    Introduction

    Every kitchen has that one appliance that quietly becomes indispensable — the one you reach for without thinking, the one that changes how you approach cooking on a Tuesday night versus how you used to. For a growing number of households, that appliance is an Instant Pot. And within the Instant Pot lineup, the Duo Plus 9-in-1 represents the most complete version of what the brand has built its reputation on: a single appliance that genuinely replaces several others, handles a broad range of cooking tasks, and does so consistently enough that people stop treating it as a special occasion tool and start treating it as the default.

    Nine functions in a 6-quart stainless steel unit — pressure cooking, slow cooking, rice making, steaming, sautéing, yogurt making, warming, sterilizing, and sous vide — alongside access to an app with over 800 recipes. That’s the product on paper. What it means in practice, for different households with different cooking habits and priorities, is a more nuanced story worth examining carefully.

    This article takes a genuinely fresh look at the Duo Plus — not covering the same ground in the same way as previous examinations, but approaching it from the angle of what the additional functions beyond the standard Duo actually add, who benefits from those additions, and how the nine-function design fits into real cooking routines for real households.


    What Sets the Duo Plus Apart From the Standard Duo

    The standard Instant Pot Duo 7-in-1 is the model that established the category and remains among the most widely used electric pressure cookers available. Understanding what the Duo Plus adds over that established foundation is the starting point for evaluating whether the upgrade matters for a specific household.

    The Duo Plus adds two functions that the standard Duo doesn’t include: sous vide and a more sophisticated sterilize cycle. It also features an upgraded blue LCD display that provides more detailed information during cooking cycles than the simpler indicator system on the standard model.

    These additions aren’t trivial, but they’re also not universally relevant. For households whose cooking needs are fully addressed by the standard Duo’s pressure cooking, slow cooking, rice, steam, sauté, yogurt, and warm functions, the Duo Plus’s additions represent capability that won’t get used. For those who specifically want sous vide capability without purchasing dedicated equipment, or who need a reliable sterilization cycle for baby bottles or canning preparation, the Duo Plus’s additions are meaningful rather than incidental.


    Key Features of the Instant Pot Duo Plus

    Pressure Cooking: The Function That Defines the Category

    Pressure cooking is the reason the Instant Pot category exists, and it remains the function that most dramatically changes what’s achievable in a home kitchen within realistic time constraints. The physics are familiar to most Instant Pot owners by now — sealed environment, steam builds pressure, internal temperature rises above water’s normal boiling point, food cooks faster than any conventional method achieves.

    But the practical implications of this deserve more than a quick summary. Consider what pressure cooking does to the actual economics and logistics of home cooking:

    Dried beans — one of the cheapest, most nutritious, most versatile foods available — have historically required either hours of soaking and simmering or the compromise of canned beans that cost more and contain more sodium. Under pressure in the Duo Plus, dried beans go from dry to perfectly cooked in 30 to 45 minutes without pre-soaking. Black beans, chickpeas, kidney beans, cannellini — all of them, done from scratch, in under an hour on a weeknight.

    Tough cuts of meat that require three to four hours of oven braising to become genuinely tender take 60 to 75 minutes under high pressure. Chuck roast, lamb shoulder, pork belly, oxtail — the cuts that produce the most satisfying, deeply flavored results also happen to be the cheapest at the butcher. Pressure cooking makes them weeknight-viable.

    Bone broth that takes 12 to 24 hours on a stovetop takes 3 to 4 hours in the Instant Pot — not just faster, but with a more concentrated result because the sealed environment prevents evaporation while the pressure extracts collagen and minerals from bones more efficiently than low-temperature simmering.

    The Duo Plus operates at two pressure levels. High pressure handles the vast majority of cooking applications — proteins, legumes, grains, soups, stews. Low pressure is reserved for more delicate applications where the temperature ceiling of high pressure would overcook before the cooking objective is achieved.

    Sous Vide: The Duo Plus’s Most Distinctive Addition

    Sous vide cooking — immersing vacuum-sealed food in precisely temperature-controlled water for extended periods — has moved from restaurant kitchens to enthusiastic home cooks over the past decade. Dedicated immersion circulators have made it accessible, but they represent an additional appliance purchase for what is, admittedly, a technique that rewards specific cooking objectives more than universal daily use.

    The Duo Plus’s sous vide function provides that temperature-controlled water bath capability without a dedicated device. The inner pot holds water maintained at a precise temperature — within fractions of a degree — for whatever duration the recipe requires.

    What sous vide actually achieves, in concrete terms:

    Chicken breast cooked sous vide at 145°F for 90 minutes is consistently moist and tender throughout — a result that’s genuinely difficult to replicate through conventional cooking because the margin between properly cooked and overcooked chicken breast is narrow and unforgiving in a pan or oven. At 145°F sustained precisely, the entire breast reaches the right temperature simultaneously without any part overcooking before another part catches up.

    Steak cooked sous vide to 130°F edge-to-edge, then briefly seared in a very hot pan, produces medium-rare consistency throughout the entire cut rather than the temperature gradient from well-done exterior to rare center that conventional cooking produces.

    Eggs at 167°F for 13 minutes produce a specific texture — fully set whites, yolk with a custardy, jammy consistency — that no other cooking method achieves as reliably.

    For households interested in exploring these techniques without the dedicated equipment investment, the Duo Plus’s sous vide function provides a legitimate starting point.

    Slow Cooking: Patience as a Cooking Strategy

    Some dishes aren’t improved by speed — they require time, and the slow cook function serves those dishes directly. The fundamental appeal of slow cooking hasn’t changed: load the appliance in the morning, return in the evening to a finished dinner that has had eight hours to develop flavors that can’t be compressed into a pressure cooking cycle.

    Pulled pork that has spent eight hours in low heat develops a texture and flavor integration that pressure-cooked pulled pork, while excellent, approaches but doesn’t fully replicate. The same applies to brisket, to chili that has had all day for the spices to bloom and meld, to white bean soup where extended cooking has broken down the beans into a creamy consistency while maintaining their shape.

    The Duo Plus’s slow cook function operates comparably to a dedicated slow cooker for these applications, though some cookbook recipes developed specifically for traditional oval slow cookers may need liquid ratio adjustments — the Instant Pot’s sealed environment prevents evaporation in a way that an offset-lid slow cooker doesn’t.

    Sauté: The Function That Makes Everything Better

    The sauté function is the one that most fundamentally changes the quality of pressure-cooked dishes, and it’s worth understanding why specifically.

    Pressure cooking creates an entirely moist cooking environment. Steam and liquid are the heat transfer media. This is excellent for breaking down collagen, hydrating dried ingredients, and cooking food through quickly — but it actively prevents the browning reactions that create much of the flavor complexity in well-made braised and slow-cooked dishes.

    The Maillard reaction — the chemical process that produces the caramelized crust on a seared steak, the golden surface on sautéed onions, the toasted complexity in bloomed spices — requires dry heat. Under pressure, these reactions can’t occur.

    The sauté function provides that dry high heat in the same vessel that will be used for pressure cooking. Brown a chuck roast on all sides before braising it. Caramelize onions until they’re deeply golden before adding liquid. Toast whole spices in oil before building a curry. Render fat from bacon or pancetta to coat the pot before adding other ingredients.

    The flavor difference between dishes where these preliminary steps happen and dishes where raw ingredients go directly into the pressure cooker is significant. The sauté function makes the one-pot version of properly developed braised dishes possible — building flavor in the same vessel rather than dirtying a separate pan for the browning steps.

    Three sauté temperature levels — less, normal, and more — accommodate the range from gentle softening to high-heat searing.

    Yogurt Function: Unexpected Daily Value

    The yogurt function seems like an oddity when scanning the feature list — how often does someone actually make yogurt at home? More often than expected, it turns out, once the process is understood.

    Making yogurt involves two temperature-dependent stages: heating milk to pasteurization temperature to eliminate competing bacteria, then cooling it and holding it at incubation temperature (typically 110°F range) for eight to twelve hours while bacterial culture transforms the lactose and proteins.

    The Duo Plus’s yogurt function automates both stages. Boil mode heats the milk to pasteurization temperature automatically. After cooling and adding starter culture, the incubate mode holds the precise temperature required for fermentation throughout the overnight process.

    The result is yogurt made from milk and starter — nothing else. No thickeners, no stabilizers, no sweeteners, no artificial flavors. The cost per batch is a fraction of equivalent commercial yogurt. The flavor is fresh and tangy. Straining it overnight through cheesecloth produces Greek-style yogurt with protein content that rivals or exceeds commercial versions.

    For households that consume significant quantities of yogurt — as a standalone food, as a cooking ingredient, as a breakfast component — the financial and quality case for making it in the Duo Plus is straightforward once the habit is established.

    Enhanced Sterilizer Function

    The Duo Plus’s sterilize function goes beyond the basic implementation in the standard Duo, providing a more calibrated sterilization cycle that maintains appropriate temperature for the required duration.

    For households with infants, sterilizing bottles, nipples, pacifiers, and breast pump components is a daily or near-daily necessity. A purpose-built sterilizer is one more appliance; the Duo Plus handles this in the same unit that makes dinner.

    For home canners preparing jars before filling, the sterilize function provides the sustained heat required without having to manage a pot of boiling water on the stovetop for the duration.

    Blue LCD Display

    The upgraded display on the Duo Plus shows more detail throughout cooking cycles than the standard model’s simpler indicator system. Current cooking stage, remaining time, temperature in sous vide mode, elapsed time in warm mode — information that’s genuinely useful during the learning period and for monitoring applications like sous vide where precise temperature visibility matters.

    Keep Warm with Elapsed Time Tracking

    The automatic transition to keep warm after any cooking cycle is standard across the Instant Pot line, but the Duo Plus’s display shows elapsed time in warm mode — helping users make informed decisions about how long food has been held and when quality starts to decline.


    How the Duo Plus Fits Into Different Cooking Approaches

    The Weeknight Efficiency Kitchen

    For households where weeknight cooking time is genuinely compressed — both adults working, children’s activities filling evenings, dinner needing to happen efficiently — the Duo Plus changes what’s achievable without extending the time at the stove.

    The specific contribution is the pressure cooking function applied to dishes that previously required either significant active cooking time or an impractically long oven session. Chicken thighs with vegetables in 20 minutes under pressure. Lentil soup from dry lentils in 15 minutes. Beef stew that tastes like it cooked all day in 45 minutes.

    The combination of sauté for flavor building and pressure cook for time compression — in a single pot with minimal cleanup — makes genuinely satisfying from-scratch cooking realistic on a Wednesday evening in a way that stovetop alternatives don’t support as easily.

    The Meal Prep Household

    Batch cooking on weekends for the week ahead is one of the most reliably practical applications of the Duo Plus’s efficiency. A full batch of shredded chicken in 20 minutes. Dried chickpeas for the week done in 40 minutes. Stock from vegetable scraps or chicken bones in 90 minutes. Each of these runs without requiring monitoring or active involvement — the machine manages itself while weekend time goes to other things.

    The 6-quart capacity is meaningful here — large enough to produce quantities worth the prep effort, without being so large that small batches become impractical.

    The Culinary Explorer Household

    For households where cooking is an active interest rather than a necessary task, the Duo Plus’s range of functions and the 800-recipe app provide a platform for genuine culinary exploration. Sous vide proteins, fermented yogurt, properly developed braises, homemade stocks — these are the techniques and preparations that distinguish thoughtful cooking from functional cooking, and the Duo Plus enables them without requiring dedicated single-function equipment for each.

    The Budget-Focused Household

    The pressure cooker’s transformative effect on inexpensive ingredients — tough cuts, dried legumes, bones and scraps for stock — has direct financial implications for households managing food budgets carefully. Chuck roast costs a fraction of premium cuts; pressure-cooked, it produces results that exceed what many premium cuts achieve through simpler cooking methods. A pound of dried beans costs under a dollar and produces multiple servings of protein-rich food; pressure-cooked, they’re done in a fraction of the time that has historically made dried beans an impractical weekday choice.


    Who the Duo Plus May Be Suitable For

    People Who Want Sous Vide Without Dedicated Equipment

    The sous vide function’s value is clearest for households that are specifically interested in the technique — interested in the precise temperature control, the consistent results with chicken breast and steak, the egg preparations that no other method replicates — but don’t want to purchase a dedicated immersion circulator for a technique they’re not certain will become a regular habit.

    The Duo Plus provides a legitimate entry point for sous vide exploration. If it becomes a regular technique, the function is available whenever needed. If it doesn’t resonate, the other eight functions provide daily value regardless.

    Households with Infants

    The combination of the sterilize function for baby equipment and the yogurt function for introducing cultured foods makes the Duo Plus specifically relevant for households in the early parenting stage. Two functions with direct daily-life application for this household type, neither of which is available on the standard Duo.

    Existing Instant Pot Users Considering an Upgrade

    For households already owning a standard Duo or earlier Instant Pot model who are considering whether the Duo Plus’s additions justify an upgrade, the calculus is specific: Does sous vide capability matter to how you cook? Do you specifically need the enhanced sterilize function? Does the better display information change how you use the appliance?

    If yes to any of these, the Duo Plus upgrade has a concrete basis. If the standard Duo’s seven functions cover all realistic cooking needs, the upgrade is harder to justify on the additions alone.

    Households Who Cook Across Multiple Techniques

    For kitchens where the cooking repertoire genuinely spans braising, slow cooking, rice and grain preparation, and exploring techniques like sous vide and yogurt fermentation, the Duo Plus consolidates more of that repertoire into a single appliance than almost anything else available at a comparable price point.


    Important Things to Consider

    Total Cook Time Versus Recipe Time

    This is the most common and consequential misunderstanding for new Instant Pot owners, and it deserves direct address every time the appliance is discussed.

    Recipe instructions for pressure cooking specify the actual pressure cooking duration — the time once the pot reaches pressure and the countdown begins. They don’t specify:

    The time to build pressure — typically 10 to 15 minutes for most cooking quantities, longer for very large liquid volumes.

    The release time — either instant (quick release, immediate) or natural (15 to 30 minutes for large liquid volumes).

    For a recipe specifying 20 minutes of pressure cooking, the realistic total time from starting the machine to serving food is 45 to 60 minutes when pressure build and natural release are included. This isn’t a limitation — 45 to 60 minutes for genuinely developed beef stew is extraordinary — but it’s a realistic expectation that prevents the specific frustration of expecting dinner in 20 minutes and discovering it won’t be ready for another 40.

    The Learning Curve Is Real and Short

    The Instant Pot genuinely requires learning — not extensive learning, but real adjustment from conventional cooking thinking. Understanding sealing rings and ensuring they’re seated properly. Understanding float valves and how to tell when pressure is reached. Understanding quick versus natural release and when each is appropriate. Understanding minimum liquid requirements for pressure cooking.

    Most households reach comfortable familiarity within two to three weeks of regular use. The learning curve exists but is definitively short. The 800-recipe app provides structured recipes with Instant Pot-specific instructions that remove most guesswork during the initial period.

    The Burn Notice Is Part of the Learning Process

    The burn notice — an error indicating the heating element detected scorching before pressure was achieved — is something most Instant Pot owners encounter at least once during the learning period. It typically happens when there’s insufficient liquid, when thick sauces are in direct contact with the heating element without adequate thin liquid beneath them, or when starchy ingredients settled on the bottom of the pot during the pressurizing phase.

    Understanding how to avoid it — adequate thin liquid in every pressure cook, thick sauces layered above rather than mixed into the liquid before pressurizing, thorough deglazing after sautéing — becomes intuitive quickly. Encountering it initially is frustrating but instructive.

    Storage Requires Planning

    The Duo Plus with its lid is a substantial appliance. It doesn’t store compactly. The lid doesn’t stack efficiently. The sealing ring storage, the steam rack, and any additional accessories add to the physical footprint. Households need a dedicated location — either permanent counter space or accessible cabinet space that doesn’t require significant reorganization to retrieve.

    Not Every Function Gets Used Equally

    Nine functions sounds comprehensive, and the capability is real, but most households find two or three functions doing the heavy lifting of regular use — typically pressure cook, sauté, and either slow cook or rice. Yogurt, sous vide, and sterilize see use in specific situations rather than daily rotation for most households. This uneven distribution is expected and doesn’t diminish the value of having the full range available when those situations arise.


    How the Duo Plus Compares to Other Cooking Approaches

    Against Dedicated Single-Function Appliances

    The Duo Plus’s most compelling comparison is against the collection of appliances it can replace: a pressure cooker, a slow cooker, a rice cooker, a steamer, a yogurt maker, and potentially a dedicated sous vide circulator. Each dedicated appliance arguably outperforms the Duo Plus in its specific domain — a fuzzy logic rice cooker produces more precisely calibrated grain-specific results, a dedicated immersion circulator offers more precise temperature control for sous vide. The Duo Plus trades that domain-specific optimization for consolidation — one appliance, one storage requirement, one learning curve, one set of components to clean.

    For households where any given function is used intensively enough that maximum performance in that domain matters daily, a dedicated appliance may serve that specific need better. For those who want reasonable performance across a range of functions without accumulating a collection of single-purpose appliances, the Duo Plus’s consolidation is directly valuable.

    Against Stovetop and Oven Cooking

    The Duo Plus doesn’t replace stovetop and oven cooking — it supplements them efficiently. Crisping, broiling, baking in full-size pans, high-heat wok cooking, grilling — none of these are Instant Pot territory. What the Duo Plus handles are the moist-heat, long-cook, and temperature-sensitive applications where pressure cooking’s time compression or sous vide’s precision offers something the stovetop and oven can’t match as efficiently.

    Thinking about the Duo Plus as a complement to existing cooking rather than a replacement for it sets more accurate expectations than approaching it as a complete kitchen solution.

    Against Air Fryers

    Air fryers and Instant Pots are frequently mentioned together because both have become dominant countertop appliance categories simultaneously, but they occupy entirely different cooking roles. Pressure cooking uses sealed moist heat. Air frying uses circulating dry heat for crisping. They don’t compete — they fill different needs. Many households that own both find them genuinely complementary, with the Instant Pot handling the dishes that benefit from moisture and pressure while the air fryer handles the dishes that benefit from dry, crisping heat.


    Frequently Asked Questions

    What’s actually different between the Duo Plus and the standard Duo 7-in-1?

    Two additional functions — sous vide and an enhanced sterilize cycle — plus a blue LCD display that shows more detail during cooking cycles. The core pressure cooking, slow cooking, rice, steam, sauté, yogurt, and warm functions are shared between both models. The upgrade is most justified for households with specific interest in sous vide or the enhanced sterilize capability.

    Can I cook frozen meat directly in the Duo Plus?

    Certain proteins cook directly from frozen under pressure with extended cook times — frozen chicken breasts or thighs, for example, take roughly 50 percent longer than fresh. However, food safety guidelines around even temperature distribution in very large frozen cuts mean checking internal temperature with a thermometer before serving is particularly important. Smaller portions from frozen work reliably; large frozen roasts are better thawed first.

    How do I prevent the burn notice?

    Ensure at least one cup of thin liquid (water, broth) is present in the pot before pressurizing. Add thick sauces or paste-based ingredients on top of the liquid rather than mixing them in before pressure builds. Deglaze the pot thoroughly with liquid after sautéing — any browned bits stuck to the bottom can trigger the burn sensor during pressurization. These habits become second nature quickly.

    Does the sous vide function require vacuum-sealed bags?

    Technically, any watertight bag works for sous vide — zip-lock bags with air carefully pressed out are commonly used and produce equivalent results to vacuum-sealed bags for most applications. Vacuum sealing is genuinely better for extended cook times and for applications where air contact matters, but it’s not strictly required to use the sous vide function effectively.

    How often does the sealing ring need to be replaced?

    The silicone sealing ring absorbs odors from cooking — particularly strong-smelling dishes like curries or fish preparations — which can transfer to subsequent cooking if the ring isn’t cleaned thoroughly. Most owners find replacing the ring every 6 to 18 months is appropriate for regular use, or maintaining separate rings for savory and sweet cooking to prevent odor transfer. Replacement rings are inexpensive and widely available.

    What’s the maximum safe fill level?

    Two-thirds full for most cooking. Half full for foods that expand during cooking — grains, legumes, foods with leavening. Overfilling prevents proper pressurization, can cause food to block the steam release valve, and creates safety concerns. The inner pot has fill-line markings that provide visual guidance.

    Can I make cheesecake in the Duo Plus?

    Yes, and pressure-cooked cheesecake is one of the more beloved Instant Pot preparations for a specific reason: the sealed moist environment produces an exceptionally smooth, crack-free cheesecake without the water bath setup that conventional oven cheesecake requires. A 7-inch springform pan fits inside the 6-quart pot on the trivet. The recipe app includes multiple cheesecake variations.

    How does the yogurt function work step by step?

    Pour milk into the inner pot. Select the Boil setting on the yogurt function — the pot heats the milk to pasteurization temperature automatically and signals when done. Remove the pot and allow the milk to cool to approximately 110°F (the display temperature on the Duo Plus makes monitoring this straightforward). Whisk in a small amount of yogurt starter or a spoonful of commercial plain yogurt containing live cultures. Return the pot to the base. Select the incubate setting — 8 hours for milder yogurt, up to 12 hours for tangier. When complete, refrigerate. Strain through cheesecloth for Greek-style thickness.


    Conclusion

    The Instant Pot Duo Plus 9-in-1 earns its position as the most feature-complete model in the standard Duo lineup through additions that are meaningful rather than nominal. Sous vide capability in a single appliance that already handles pressure cooking, slow cooking, and rice making changes the calculus for households interested in precision cooking techniques without dedicated equipment. The enhanced sterilize function has genuine daily utility for households with infants. And the blue LCD display makes the cooking cycle more transparent for users who want to understand what the appliance is doing at each stage.

    The core pressure cooking capability — the function that drives the most dramatic changes to what’s achievable in a home kitchen within realistic time constraints — is the same across the Duo Plus and the standard Duo. What the Plus adds is specific capability for specific household needs.

    For households whose cooking reaches into sous vide territory, who need a reliable sterilization capability, or who specifically value the display improvements, the Duo Plus is the right version of the Instant Pot Duo. For those whose realistic cooking needs are fully covered by the standard Duo’s seven functions, the Duo is the more focused and typically less expensive choice.

    Either way, the pressure cooking foundation that both models share continues to represent one of the more genuinely impactful changes a household can make to how it approaches cooking — not just faster food, but a fundamental expansion of what’s achievable on a weeknight schedule with real ingredients and reasonable time.

    You can check more details on Amazon here.


    USE THIS FORM FOR YOUR NEXT ARTICLE REQUEST:


    Write a long-form, high-quality informational article about the Amazon product listed below.

    Requirements:

    • The article must fully respect Amazon Associates Program policies for 2026
    • Do NOT use direct review-style language
    • Do NOT say “Buy Now”, “Best Product”, “Top Rated”, “5 stars”, or exaggerated claims
    • Do NOT pretend to have personal experience with the product
    • Keep the tone natural, professional, and trustworthy
    • Write like a helpful blog article, not a sales page
    • Focus on education, usage ideas, features, benefits, and practical information
    • Include balanced language and avoid misleading statements
    • Avoid fake testimonials or fake user experiences
    • Make the article unique and human-like every time
    • Optimize naturally for SEO without keyword stuffing
    • Use clear headings and subheadings
    • Include: Introduction / Key Features / How It Can Be Used / Who It May Be Suitable For / Important Things to Consider / Comparison with general methods or categories / Frequently Asked Questions / Conclusion
    • Add a soft CTA only: “You can check more details on Amazon here.”
    • Do NOT mention prices unless provided
    • Do NOT copy Amazon descriptions word-for-word
    • Make the article at least 2500 words
    • Output only the final article